A step-by-step guide on creating an admin user in Zoho CRM
To get started navigate to settings, then click on users, which is found under general settings. You will then want to click on the add new user button.

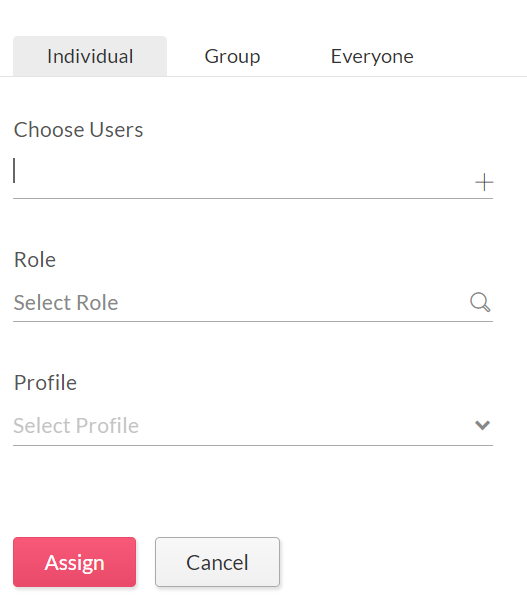
You will arrive on a screen that looks like the image below. You will want to start by adding a new user. Click the choose users field and then scroll down to select create new user.

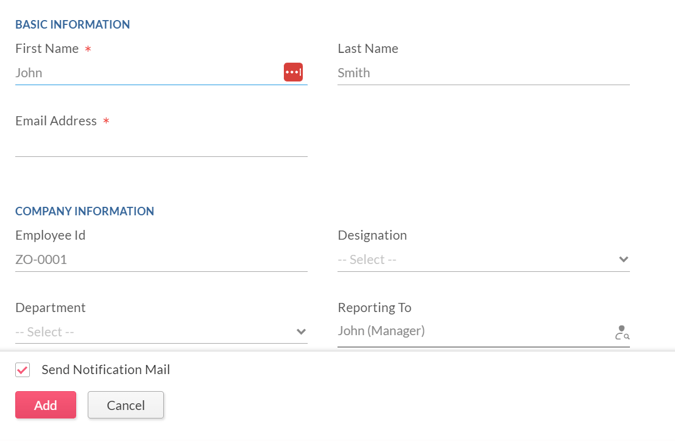
Begin adding all of the information into the fields below. First name and email address are required. All of the other fields are optional but can help you organize your users.

Once all of the fields have been completed, click on add. Next, you will need to choose a role. Make sure to click on the role that best describes that user within your organization. The final step is to choose a profile. You will want to select Administrator from the dropdown here.
Once all of the fields have been filled out, they should look similar to the image below.

Once you click assign, the admin user will be created.
